1
2
3
4
5
6
7
8
9
10
11
12
13
14
15
16
17
18
19
20
21
22
23
24
25
26
27
28
29
30
31
32
33
34
35
36
37
38
39
40
41
42
43
44
45
46
47
48
49
50
51
52
53
54
55
56
57
58
59
60
61
62
63
64
65
66
67
68
69
70
71
72
73
74
75
76
77
78
|
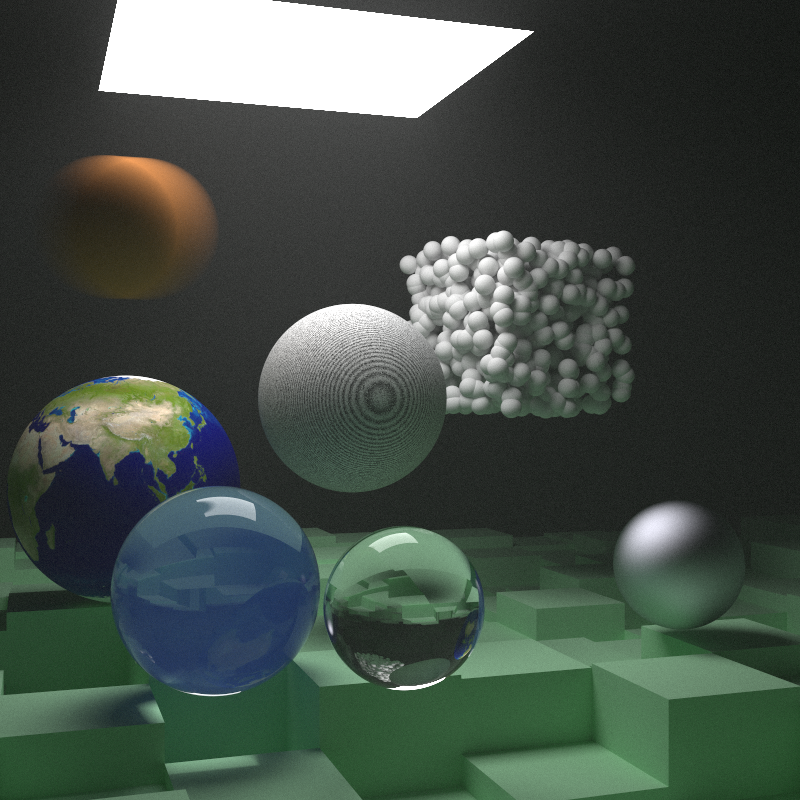
hittable_list final_scene() {
hittable_list boxes1;
auto ground = make_shared<lambertian>(color(0.48, 0.83, 0.53));
const int boxes_per_side = 20;
for (int i = 0; i < boxes_per_side; i++) {
for (int j = 0; j < boxes_per_side; j++) {
auto w = 100.0;
auto x0 = -1000.0 + i * w;
auto z0 = -1000.0 + j * w;
auto y0 = 0.0;
auto x1 = x0 + w;
auto y1 = random_double(1, 101);
auto z1 = z0 + w;
boxes1.add(make_shared<box>(point3(x0, y0, z0), point3(x1, y1, z1), ground));
}
}
hittable_list objects;
objects.add(make_shared<bvh_node>(boxes1, 0, 1));
auto light = make_shared<diffuse_light>(color(7, 7, 7));
objects.add(make_shared<xz_rect>(123, 423, 147, 412, 554, light));
auto center1 = point3(400, 400, 200);
auto center2 = center1 + vec3(30, 0, 0);
auto moving_sphere_material = make_shared<lambertian>(color(0.7, 0.3, 0.1));
objects.add(make_shared<sphere>(center1, center2, 0, 1, 50, moving_sphere_material));
objects.add(make_shared<sphere>(
point3(260, 150, 45), point3(260, 150, 45), 0, 1, 50, make_shared<dielectric>(1.5)));
objects.add(make_shared<sphere>(
point3(0, 150, 145), point3(0, 150, 145), 0, 1, 50, make_shared<metal>(color(0.8, 0.8, 0.9), 1.0)
));
auto boundary = make_shared<sphere>(
point3(360, 150, 145), point3(360, 150, 145), 0, 1, 70, make_shared<dielectric>(1.5));
objects.add(boundary);
objects.add(make_shared<constant_medium>(boundary, 0.01, color(0.2, 0.4, 0.9)));
boundary = make_shared<sphere>(
point3(0, 0, 0), point3(0, 0, 0), 0, 1, 5000, make_shared<dielectric>(1.5));
objects.add(make_shared<constant_medium>(boundary, .0001, color(1, 1, 1)));
auto emat = make_shared<lambertian>(make_shared<image_texture>(
"D:\\TechStack\\ComputerGraphics\\Ray Tracing in One Weekend Series\\Project\\Textures\\earthmap.jpg"));
objects.add(make_shared<sphere>(
point3(400, 200, 400), point3(400, 200, 400), 0, 1, 100, emat));
auto pertext = make_shared<noise_texture>(4);
objects.add(make_shared<sphere>(
point3(220, 280, 300), point3(220, 280, 300), 0, 1, 80, make_shared<lambertian>(pertext)));
hittable_list boxes2;
auto white = make_shared<lambertian>(color(.73, .73, .73));
int ns = 1000;
for (int j = 0; j < ns; j++) {
auto center = random_vec(0, 165);
boxes2.add(make_shared<sphere>(
center, center, 0, 1, 10, white));
}
objects.add(make_shared<translate>(
make_shared<rotate_y>(
make_shared<bvh_node>(boxes2, 0.0, 1.0), 15),
vec3(-100, 270, 395)
)
);
return objects;
}
|