之前的场景中一直缺少一个重要的元素,那就是光源,这一节我们来实现光源,这样我们之后就可以随意控制场景中的光照了。
1 自发光材质
光源可以认为是会自发光的材质,并且其他光线到达其表面也不会发生散射,这样的材质实现非常简单:
1 | // 自发光材质 |
注意到上面还重载了另一个虚函数 emitted,因此要在 material 抽象类中加入 emitted 的声明,但因为我们不需要所有派生类都实现这个方法,因此不必定义为纯虚函数:
1 | class material { |
2 为场景添加背景颜色
为了之后测试光源,我们需要一个全黑的背景,这样所有的光线就都来自于光源了,为此我们在 ray_color 函数中增加一个背景颜色的参数,并作相应的修改:
1 | // 得到光线颜色 |
然后在主函数中增加背景颜色:
1 | ... |
为了方便,我们把之前的场景的背景统一设置为了天空的蓝白色。
3 矩形物体
接下来我们实现另一类物体——矩形,矩形在我们之后的场景中非常重要,它既可以作为面光源,也可以组合成立方体等等。为了实现矩形物体类,我们首先要考虑的就是它的 hit 函数,这里为了实现方便,我们实现的矩形是一个轴对齐矩形。
对于一个三维空间中存在于 xy 平面内的矩形,可以直接用它的 z 坐标来描述它的位置,比如 z = k,又因为它是轴对齐矩形,因此可以用四条线 x = x0, x = x1, y = y0, y = y1 来定义这个矩形,这和之前的轴对齐包围盒非常相似,如下图:
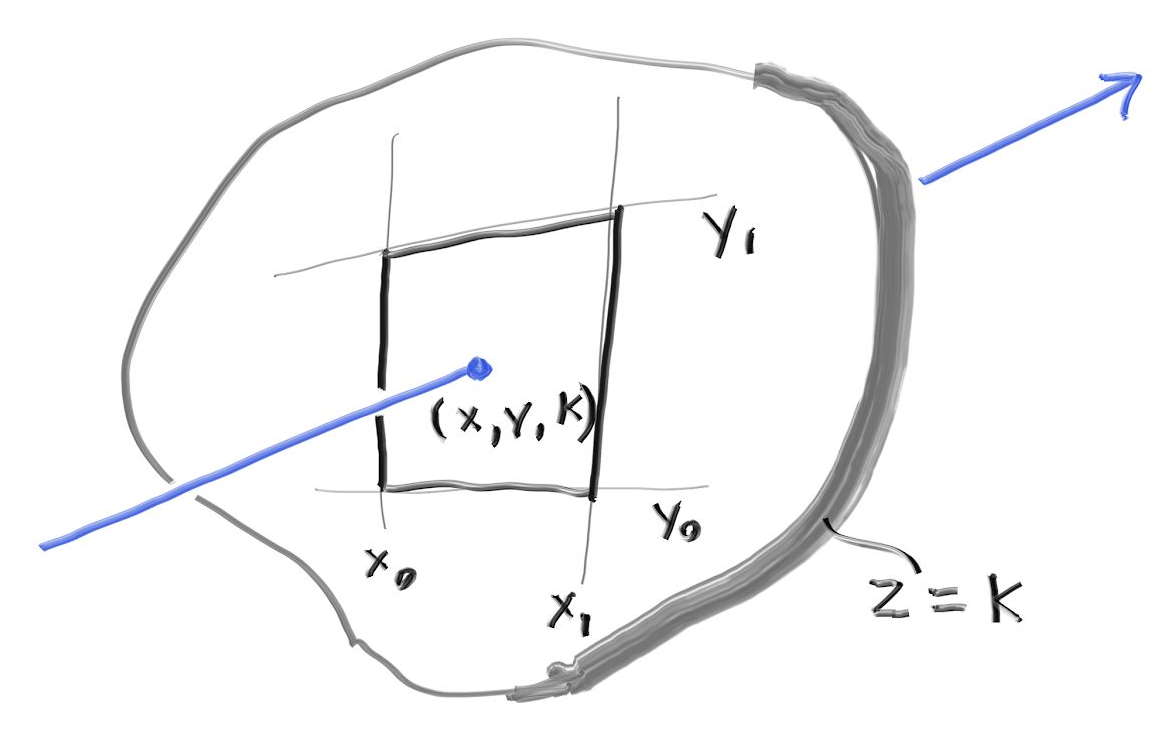
于是求光线和矩形的交点可以类似于图形学中求光线和三角形的交点,分为两步,先求光线和 z = k 平面的交点,然后判断该交点是否在矩形内部。光线和 z = k 平面的交点非常容易求得,对于光线 $P(t) = A + tb$,可以直接用它的 z 坐标和 z = k 联立:
$$
P_z(t) = A_z + tb_z = k
$$
于是可以求得与 z = k 平面相交的 t:
$$
t = \frac{k-A_z}{b_z}
$$
然后将该 t 带入光线的其他两个维度的坐标方程就可以得到 x 和 y 的坐标:
$$
x = A_x + tb_x,\ y = A_y+tb_y
$$
如果光线和矩形有交点,那么必须满足:
$$
x_0 < x < x_1 \ 且\ y_0 < y < y_1
$$
有了 hit 函数,接下来考虑一个矩形物体的包围盒,由于我们的轴对齐矩形是没有 z 方向的厚度的,这在 BVH 随机维度划分的时候会出问题,因此我们为矩形物体包围盒的 z 方向填充一个很小的长度。
一个 xy 平面的轴对齐矩形物体类的实现如下:
1 | /* |
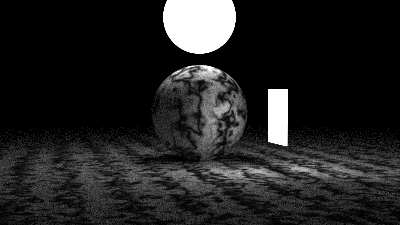
4 测试光源
现在我们来创建一个包含一个面光源的简单场景:
1 | // 简单光照场景 |
注意到我们给定的光源的颜色是大于 (1, 1, 1) 的,这是为了保证光源足够亮,以照亮其他物体。
然后修改主函数:
1 |
|
得到的效果如下:
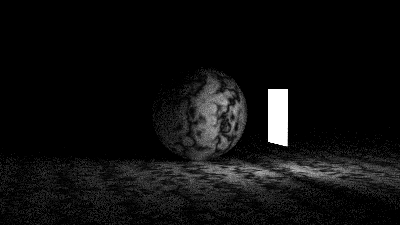
我们也可以使用球体作为光源:
5 其他轴对齐矩形
现在我们增加其他两个平面的轴对齐矩形的实现:
1 | // xz平面矩形 |
6 创建 Cornell Box
有了矩形物体,我们可以创建一个著名的 Cornell Box 场景:
1 | // Cornell Box场景 |
修改主函数:
1 | int main() { |
得到的效果如下:
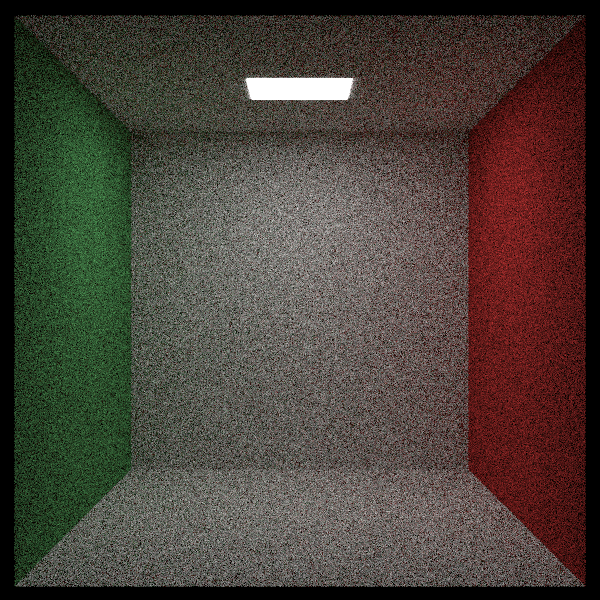
由于光源太小,导致图片中噪声非常大。