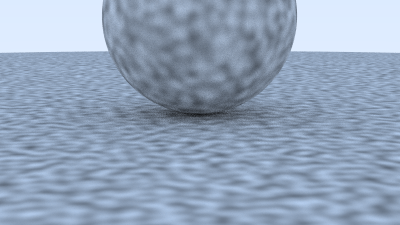
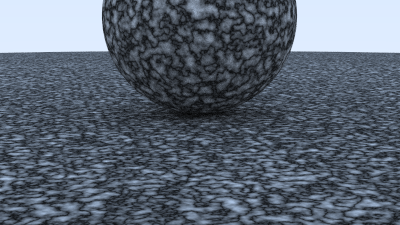
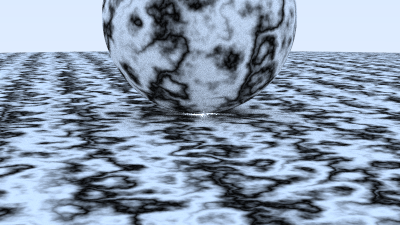
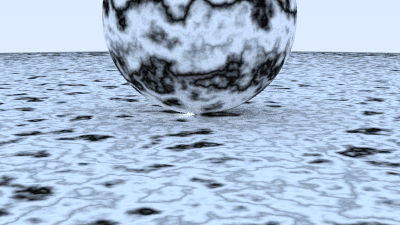
噪声在游戏领域的应用极为广泛,能帮助我们产生更加真实的纹理、特效等。之前在 Shader 的学习中,我们就使用过噪声纹理,并在最后提到了这些噪声纹理来自于哪里,著名的 Perlin 噪声就是其中之一。Perlin 噪声由于计算量小,效果好而被广泛应用,它的发明者 Ken Perlin 凭借这一算法还获得了当年的奥斯卡科技成果奖。这一节我们在光线追踪器中自己实现 Perlin 噪声。
1 Perlin 噪声原理 Perlin 噪声的产生是由于,如果我们用完全随机的噪声,比如白噪声,生成的纹理或者效果会显得非常不自然,因为很多真实世界中看似没有规律的事物,实际上是存在一定规律的,只是看起来是杂乱无章的。因此 Perlin 噪声诞生了,Perlin 噪声是一个非常强大算法,经常用于程序生成随机内容,在游戏和其他像电影、动画等多媒体领域广泛应用。在游戏领域,Perlin 噪声可以用于生成波形,起伏不平的材质或者纹理。Perlin 噪声绝大部分应用在二维,三维层面上,但某种意义上也能拓展到四维。Perlin 噪声在一维层面上可用于卷轴地形、模拟手绘线条等,在二维或三维上用于生成随机地形,火焰燃烧特效,水和云等等。如果将 Perlin 噪声拓展到四维层面,即 w 轴代表时间,就能利用 Perlin 噪声生成动画。
Perlin噪声实现需要三个步骤:
定义一个晶格结构,每个晶格的顶点有一个“伪随机”的梯度向量。所谓“伪随机”是指,对于给定的输入得到的值是一样的,因此并不是真正的随机。但并不影响效果,因为只要相同的值离得足够远,就看不出来是伪随机。对于二维的 Perlin 噪声来说,晶格结构就是一个平面网格,三维的就是一个立方体网格。
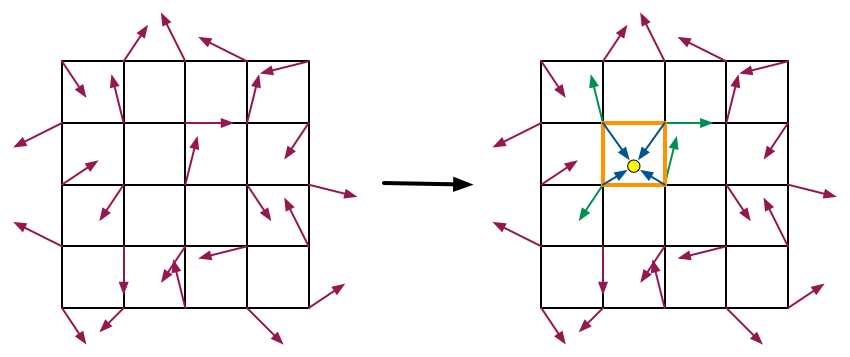
输入一个点(二维的话就是二维坐标,三维就是三维坐标),我们找到和它相邻的那些晶格顶点(二维下有4个,三维下有8个),计算该点到各个晶格顶点的距离向量,再分别与顶点上的梯度向量做点乘,得到二维下 4 个,三维下 8 个点乘结果。
使用缓和曲线(ease curves)来计算它们的权重和。在原始的 Perlin 噪声实现中,缓和曲线是 $s(t)=3t^2−2t^3$,在2002年的论文中,Perlin 改进为 $s(t)=6t^5−15t^4+10t^3$。
这里简单解释一下,为什么不直接使用线性插值,即 $s(t) = t$。直接使用的线性插值的话,它的一阶导在晶格顶点处(即 t = 0 或 t = 1)不为 0,会造成明显的不连续性。 $s(t)=3t^2−2t^3$ 在一阶导满足连续性, $s(t)=6t^5−15t^4+10t^3$ 在二阶导上仍然满足连续性。
下图描述了前两个步骤:
2 实现 我们从简到繁一步一步实现 Perlin 噪声,首先实现一个简化版本。Perlin 噪声函数实际上就是对于一个给定的输入点,输出一个 double 类型的噪声值,这个值是伪随机的,也就是说对于相同的给定点,得到的值会是一样的。因此我们实现一个 Perlin 噪声类,在类中根据以上步骤计算噪声值。
在具体实现中,我们使用 256 个晶格,但是先不去计算每个晶格顶点的随机梯度向量,也不去计算给定的点和周围八个晶格顶点的距离向量和随机梯度向量的点乘,我们直接随机生成这些点乘结果存在一个查找表中(只是这样理解,因为点乘也只是一个数字而已,但实际上这是一种并不正确的简化,之后会正确的实现),然后根据给定点的坐标去查找点乘结果,然后将这些点乘结果利用三线性插值结合起来。
在查找的时候,我们预先计算一个随机排列数组 P[n],P[n] 里面存储的是打乱后的 0-255 的排列值,然后我们根据给定点的坐标作为索引,到 P[n] 中找到一个 0-255 的下标,用这个下标取到查找表中对应的点乘结果。对于三维空间,我们要分别计算三个维度的 P[n] 数组,然后将三个下标值加起来并限制在 0~255 的范围,再去查找对应的点乘结果,作为一个顶点的点乘,这样查找八次即可。
1 2 3 4 5 6 7 8 9 10 11 12 13 14 15 16 17 18 19 20 21 22 23 24 25 26 27 28 29 30 31 32 33 34 35 36 37 38 39 40 41 42 43 44 45 46 47 48 49 50 51 52 53 54 55 56 57 58 59 60 61 62 63 64 65 66 67 68 69 70 71 72 73 74 75 76 77 78 79 80 81 82 83 84 85 86 87 88 89 90 91 92 93 94 95 96 97 98 99 100 101 102 #pragma once #ifndef PERLIN_H #define PERLIN_H #include "utilities.h" class perlin {public : perlin () { ranfloat = new double [point_count]; for (int i = 0 ; i < point_count; ++i) { ranfloat[i] = random_double (); } perm_x = perlin_generate_perm (); perm_y = perlin_generate_perm (); perm_z = perlin_generate_perm (); } ~perlin () { delete [] ranfloat; delete [] perm_x; delete [] perm_y; delete [] perm_z; } double noise (const point3& p) const auto u = p.x () - floor (p.x ()); auto v = p.y () - floor (p.y ()); auto w = p.z () - floor (p.z ()); auto i = static_cast <int >(floor (p.x ())); auto j = static_cast <int >(floor (p.y ())); auto k = static_cast <int >(floor (p.z ())); double c[2 ][2 ][2 ]; for (int di = 0 ; di < 2 ; di++) for (int dj = 0 ; dj < 2 ; dj++) for (int dk = 0 ; dk < 2 ; dk++) c[di][dj][dk] = ranfloat[ perm_x[(i + di) & 255 ] ^ perm_y[(j + dj) & 255 ] ^ perm_z[(k + dk) & 255 ] ]; return trilinear_interp (c, u, v, w); } private : static const int point_count = 256 ; double * ranfloat; int * perm_x; int * perm_y; int * perm_z; static int * perlin_generate_perm () auto p = new int [point_count]; for (int i = 0 ; i < perlin::point_count; i++) p[i] = i; permute (p, point_count); return p; } static void permute (int * p, int n) for (int i = n - 1 ; i > 0 ; i--) { int target = random_int (0 , i); int tmp = p[i]; p[i] = p[target]; p[target] = tmp; } } static double trilinear_interp (double c[2 ][2 ][2 ], double u, double v, double w) auto accum = 0.0 ; for (int i = 0 ; i < 2 ; i++) for (int j = 0 ; j < 2 ; j++) for (int k = 0 ; k < 2 ; k++) accum += (i * u + (1 - i) * (1 - u)) * (j * v + (1 - j) * (1 - v)) * (k * w + (1 - k) * (1 - w)) * c[i][j][k]; return accum; } }; #endif
3 测试效果 然后我们创建一个 Perlin 噪声纹理:
1 2 3 4 5 6 7 8 9 10 11 12 class noise_texture : public texture {public : noise_texture () {} virtual color value (double u, double v, const point3& p) const override return color (1 , 1 , 1 ) * noise.noise (p); } public : perlin noise; };
再创建一个新场景:
1 2 3 4 5 6 7 8 9 10 11 12 hittable_list two_perlin_spheres () { hittable_list objects; auto pertext = make_shared <noise_texture>(); objects.add (make_shared <sphere>( point3 (0 , -1000 , 0 ), point3 (0 , -1000 , 0 ), 0.0 , 1.0 , 1000 , make_shared <lambertian>(pertext))); objects.add (make_shared <sphere>( point3 (0 , 2 , 0 ), point3 (0 , 2 , 0 ), 0.0 , 1.0 , 2 , make_shared <lambertian>(pertext))); return objects; }
最后修改主函数部分:
1
2
3
4
5
6
7
8
9
10
11
12
13
14
15
16
17
18
19
20
21
22
switch (0 ) { case 1 : world = random_scene (); lookfrom = point3 (13 , 2 , 3 ); lookat = point3 (0 , 0 , 0 ); vfov = 20.0 ; aperture = 0.1 ; break ; case 2 : world = two_spheres (); lookfrom = point3 (13 , 2 , 3 ); lookat = point3 (0 , 0 , 0 ); vfov = 20.0 ; break ; default : case 3 : world = two_perlin_spheres (); lookfrom = point3 (13 , 2 , 3 ); lookat = point3 (0 , 0 , 0 ); vfov = 20.0 ; break ; }
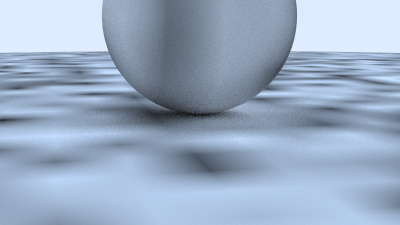
得到的效果如下:
4 改进实现 接下来我们改进上面的简化版实现,首先是插值系数,我们使用 $s(t)=6t^5−15t^4+10t^3$ 来改进插值系数,在 Perlin 类中加一个 fade 函数:
1
2
3
4
static double fade (double x) return x * x * x * (x * (x * 6 - 15 ) + 10 ); }
然后修改 noise 函数:
1 2 3 4 5 6 7 8 9 10 11 12 13 14 15 16 17 18 19 20 21 22 23 24 25 26 27 28 29 double noise (const point3& p) const auto u = p.x () - floor (p.x ()); auto v = p.y () - floor (p.y ()); auto w = p.z () - floor (p.z ()); u = fade (u); v = fade (v); w = fade (w); auto i = static_cast <int >(floor (p.x ())); auto j = static_cast <int >(floor (p.y ())); auto k = static_cast <int >(floor (p.z ())); double c[2 ][2 ][2 ]; for (int di = 0 ; di < 2 ; di++) for (int dj = 0 ; dj < 2 ; dj++) for (int dk = 0 ; dk < 2 ; dk++) c[di][dj][dk] = ranfloat[ perm_x[(i + di) & 255 ] ^ perm_y[(j + dj) & 255 ] ^ perm_z[(k + dk) & 255 ] ]; return trilinear_interp (c, u, v, w); }
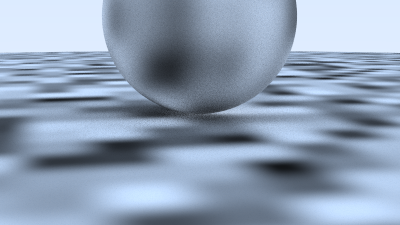
效果如下:
可以看出一些随机效果,但是频率太低了,我们可以为纹理加上一个频率属性,控制随机的频率,这可以通过对传入 noise 函数的顶点值 p 进行缩放实现:
1 2 3 4 5 6 7 8 9 10 11 12 13 14 class noise_texture : public texture {public : noise_texture () {} noise_texture (double sc) : scale (sc) {} virtual color value (double u, double v, const point3& p) const override return color (1 , 1 , 1 ) * noise.noise (scale * p); } public : perlin noise; double scale; };
然后修改场景中的纹理,给定一个缩放系数:
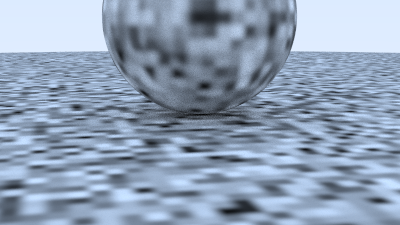
1 2 3 4 5 6 7 8 9 10 11 12 hittable_list two_perlin_spheres () { hittable_list objects; auto pertext = make_shared <noise_texture>(4 ); objects.add (make_shared <sphere>( point3 (0 , -1000 , 0 ), point3 (0 , -1000 , 0 ), 0.0 , 1.0 , 1000 , make_shared <lambertian>(pertext))); objects.add (make_shared <sphere>( point3 (0 , 2 , 0 ), point3 (0 , 2 , 0 ), 0.0 , 1.0 , 2 , make_shared <lambertian>(pertext))); return objects; }
效果如下:
最后我们来实现真正的 Perlin 噪声函数,现在只要将随机生成的点乘结果,变为随机生成梯度向量,然后和点 p 到八个晶格顶点的距离向量做点乘,再利用三线性插值融合点乘结果即可。为此我们需要修改 Perlin 类:
1 2 3 4 5 6 7 8 9 10 11 12 13 14 15 16 17 18 19 20 21 22 23 24 25 26 27 28 29 30 31 32 33 34 35 36 37 38 39 40 41 42 43 44 45 46 47 48 49 50 51 52 53 54 55 56 57 58 59 60 61 62 63 64 65 66 67 68 69 70 71 72 73 74 75 76 77 78 79 80 81 82 83 84 85 86 87 88 89 90 91 92 93 94 95 96 97 98 99 100 101 102 103 104 105 106 107 108 109 110 111 112 113 114 115 116 117 #pragma once #ifndef PERLIN_H #define PERLIN_H #include "utilities.h" class perlin {public : perlin () { ranvec = new vec3[point_count]; for (int i = 0 ; i < point_count; ++i) { ranvec[i] = normalize (random_vec (-1 , 1 )); } perm_x = perlin_generate_perm (); perm_y = perlin_generate_perm (); perm_z = perlin_generate_perm (); } ~perlin () { delete [] ranvec; delete [] perm_x; delete [] perm_y; delete [] perm_z; } double noise (const point3& p) const auto u = p.x () - floor (p.x ()); auto v = p.y () - floor (p.y ()); auto w = p.z () - floor (p.z ()); auto i = static_cast <int >(floor (p.x ())); auto j = static_cast <int >(floor (p.y ())); auto k = static_cast <int >(floor (p.z ())); vec3 c[2 ][2 ][2 ]; for (int di = 0 ; di < 2 ; di++) for (int dj = 0 ; dj < 2 ; dj++) for (int dk = 0 ; dk < 2 ; dk++) c[di][dj][dk] = ranvec[ perm_x[(i + di) & 255 ] ^ perm_y[(j + dj) & 255 ] ^ perm_z[(k + dk) & 255 ] ]; return perlin_interp (c, u, v, w); } private : static const int point_count = 256 ; vec3* ranvec; int * perm_x; int * perm_y; int * perm_z; static int * perlin_generate_perm () auto p = new int [point_count]; for (int i = 0 ; i < perlin::point_count; i++) p[i] = i; permute (p, point_count); return p; } static void permute (int * p, int n) for (int i = n - 1 ; i > 0 ; i--) { int target = random_int (0 , i); int tmp = p[i]; p[i] = p[target]; p[target] = tmp; } } static double perlin_interp (vec3 c[2 ][2 ][2 ], double u, double v, double w) auto uu = fade (u); auto vv = fade (v); auto ww = fade (w); auto accum = 0.0 ; for (int i = 0 ; i < 2 ; i++) for (int j = 0 ; j < 2 ; j++) for (int k = 0 ; k < 2 ; k++) { vec3 weight_v (u - i, v - j, w - k) ; accum += (i * uu + (1 - i) * (1 - uu)) * (j * vv + (1 - j) * (1 - vv)) * (k * ww + (1 - k) * (1 - ww)) * dot (c[i][j][k], weight_v); } return accum; } static double fade (double x) { return x * x * x * (x * (x * 6 - 15 ) + 10 ); } }; #endif
按照这样的实现,由于向量点乘可能为负,因此 noise 函数输出的值可能为负,这样得到的颜色值就可能为负,最后进行伽马校正的时候我们要开根号,就会得到不正确的值。所以我们要在纹理类中将得到的噪声值从 [-1, 1] 映射到 [0, 1]:
1 2 3 4 5 6 7 8 9 10 11 12 13 14 15 class noise_texture : public texture {public : noise_texture () {} noise_texture (double sc) : scale (sc) {} virtual color value (double u, double v, const point3& p) const override return color (1 , 1 , 1 ) * 0.5 * (1.0 + noise.noise (scale * p)); } public : perlin noise; double scale; };
最后看一下真正的 Perlin 噪声的效果:
5 Turbulence 将多个不同频率的噪声混合起来得到的噪声称为 Turbulence,利用 Turbulence 可以实现许多随机纹理,我们可以通过多次调用 noise 函数并将结果融合来得到 Turbulence。在 Perlin 类中增加:
1 2 3 4 5 6 7 8 9 10 11 12 13 14 double turb (const point3& p, int depth = 7 ) const auto accum = 0.0 ; auto temp_p = p; auto weight = 1.0 ; for (int i = 0 ; i < depth; i++) { accum += weight * noise (temp_p); weight *= 0.5 ; temp_p *= 2 ; } return fabs (accum); }
然后修改噪声纹理类:
1 2 3 4 5 6 7 8 9 10 11 12 13 14 15 class noise_texture : public texture {public : noise_texture () {} noise_texture (double sc) : scale (sc) {} virtual color value (double u, double v, const point3& p) const override return color (1 , 1 , 1 ) * noise.turb (scale * p); } public : perlin noise; double scale; };
得到的效果如下:
6 大理石纹理 一般来说,Turbulence 不会像上面那样直接使用。而是会作为一个随机扰动来生成不同的纹理,比如大理石纹理。我们可以让点 p 的某一维度和三角函数成正比,这样就可以模拟大理石的裂痕曲线,但是为了不让曲线有规律,我们使用 Turbulence 来改变三角函数的相位,这样就可以实现一个随机的大理石纹理:
1 2 3 4 5 6 7 8 9 10 11 12 13 14 15 class noise_texture : public texture {public : noise_texture () {} noise_texture (double sc) : scale (sc) {} virtual color value (double u, double v, const point3& p) const override return color (1 , 1 , 1 ) * 0.5 * (1 + sin (scale * p.z () + 10 * noise.turb (p))); } public : perlin noise; double scale; };
效果如下:
如果我们把点 p 和三角函数成正比的维度改为 y 轴,得到的效果如下:
