到目前为止,我们的简易光线追踪器就差不多了,接下来对相机进行一些改进,使得我们能在任何角度观察场景并且模拟镜头相机的景深效果。
1 更强大的相机
到目前为止我们的相机基本上还是固定的,我们希望能够让相机更强大一些。比如可以调节视场角大小以扩充我们的视野,以及能够移动相机,从不同的角度观察整个场景。
1.1 自定义视场
对于视场角,一般使用垂直视场角,我们将视场角加到相机类的构造函数中,通过视场角和宽高比来计算视口尺寸,这是一个简单的几何计算:
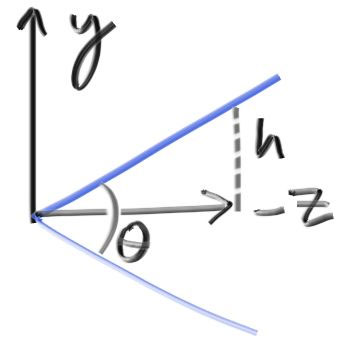
我们假设视口平面在 z = -1 处,于是视口的高度 h 即为:
$$
h = tan(\frac{\theta}{2})
$$
由此我们可以修改相机类:
1 | /* |
1.2 自定义指向和位置
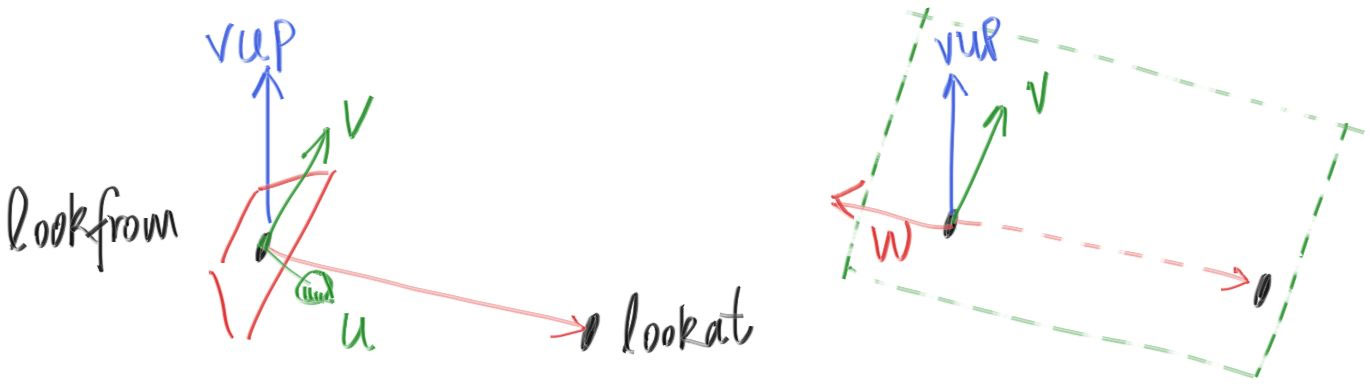
接下来我们希望摄像机能在任何位置任何角度观察场景。首先回顾之前图形学中学习的如何固定一个相机位置和姿态,我们需要一个位置、观察方向,以及一个 up 向量,这个 up 向量指定了相机旋转的角度,然后我们要根据这些值来计算在这个对应的角度下视口平面是怎样的,这可以通过两次叉乘得到:
- up 向量和观察方向 w 叉乘得到视口平面 u 方向
- u 方向和 w 方向叉乘得到视口平面 v 方向
其中观察方向 w 可以通过给定的相机位置 lookfrom 和要观察的点 lookat 得到,我们沿着 -w 方向观察,如下图:
于是我们可以继续修改相机类:
1 | /* |
然后修改主函数:
1 |
|
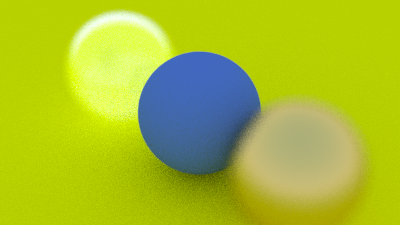
得到的效果如下:
调整视场角为 30 度,得到的效果如下:
2 散焦模糊
之前我们投射光线都假设相机的镜头是一个只容纳一根光线的针孔,一根光线投射出去会打到场景中的一个点,但实际相机的镜头是一个透镜,透镜会将场景中多束光线汇聚到一个点上,如下图:
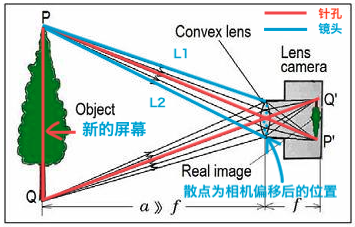
对于树的顶点P,其传入到成像屏幕的范围,从之前的一条光线,扩大到 L1 到 L2 两条光线之间的部分,尽管采样的光线变多了,但并不影响这一棵树的清晰成像,因为目前这棵树到相机的距离,刚好是新的屏幕到相机的距离,即焦点距离。焦点距离不等同于焦距,焦距是投影点到图像平面的距离。
但是如果我们的相机向前移动一点,原本能采样到树顶的像素颜色,变成了多条光线采样值的混合色,也就是树顶部下面一片区域的颜色,从而导致这个像素变模糊,越往前移动,越模糊,因为 L1 和 L2 的区间会扩大更多;而如果我们的相机向后移动一点,并延长光线L1 和 L2 至树的纵切平面,则会采样天空和树头顶的颜色的混合色,同样实现模糊。越往后,L1 和 L2 的区间将会扩大,从而越模糊。
因此,只要物体到相机的距离不等于焦点距离,就会出现模糊,光圈越大,采样射线的跨度越大,模糊效果越明显,这就是散焦模糊的原理。我们为了简单的模拟这一过程,可以将原本相机位置的一个点,变为相机所在位置为中心的一个圆盘内的点,然后从圆盘内的多个点出发,投射光线到场景中并采样求平均,就可以实现上述镜头景深的效果。
首先先增加一个生成单位圆盘内随机点的函数:
1 | // 生成单位圆盘内随机一点 |
然后修改相机类:
1 | /* |
然后修改相机参数:
1 | /*******创建相机*******/ |
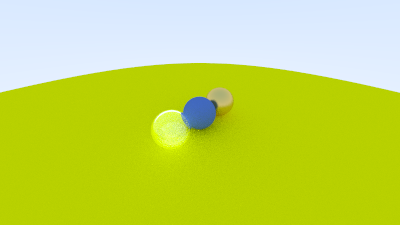
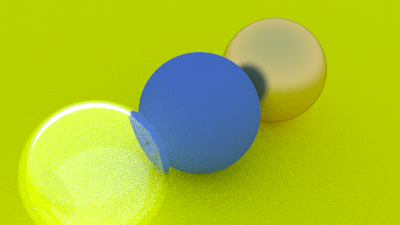
得到的效果如下:
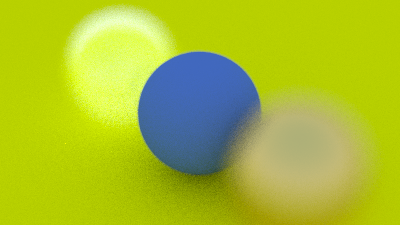
减小光圈将会降低模糊:
1 | auto aperture = 1.0; |