上一节渲染的球体边缘可以明显看到锯齿,为了得到更好的效果我们需要实现一个简单的反走样算法,并且实现一个相机类,以便于管理虚拟摄像机和之后的各种场景采样任务。
1 生成随机数的工具函数 首先我们要向 utilities.h 中添加两个生成随机数的函数,用于在像素内部随机采样,一个生成 [0 ,1] 之间的随机数,另一个可以定制随机数范围,在 C++ 11 中可以不使用传统的 rand() 实现,可以使用 <random> 中提供的方法实现:
1 2 3 4 5 6 7 8 9 10 11 12 13 14 15 16 17 18 19 20 21 22 23 ... #include <random> ... inline double random_double () static std::uniform_real_distribution<double > distribution (0.0 , 1.0 ) static std::mt19937 generator (std::random_device{}()) return distribution (generator); } inline double random_double (double min, double max) return min + (max - min) * random_double (); } ...
2 实现相机类 现在我们实现一个相机类来管理虚拟摄像机以及场景中的各种采样任务,我们先使用之前的轴对齐摄像机作为默认构造方法,来实现一个简单的相机类,只需要把之前主函数中的设置相机的代码拿过来组织一下即可:
1 2 3 4 5 6 7 8 9 10 11 12 13 14 15 16 17 18 19 20 21 22 23 24 25 26 27 28 29 30 31 32 33 34 35 #pragma once #ifndef CAMERA_H #define CAMERA_H #include "utilities.h" class camera {public : camera () { auto aspect_ratio = 16.0 / 9.0 ; auto viewport_height = 2.0 ; auto viewport_width = aspect_ratio * viewport_height; auto focal_length = 1.0 ; origin = point3 (0 , 0 , 0 ); horizontal = vec3 (viewport_width, 0.0 , 0.0 ); vertical = vec3 (0.0 , viewport_height, 0.0 ); lower_left_corner = origin - horizontal / 2 - vertical / 2 - vec3 (0 , 0 , focal_length); } ray get_ray (double u, double v) const { return ray (origin, lower_left_corner + u * horizontal + v * vertical - origin); } private : point3 origin; point3 lower_left_corner; vec3 horizontal; vec3 vertical; }; #endif
3 反走样 光线追踪中最简单的反走样就是在一个像素内部投射出多条光线,将他们的得到的颜色混合起来作为该像素的颜色。
在实现时,我们可以将多根光线的颜色先全部累加到像素中,然后在 write_color 函数中将该像素颜色除以采样数量即可。在此之前我们先在 utilities.h 中添加一个截断函数,用于将给定值截取在指定范围内,同时修改 write_color 函数:
1 2 3 4 5 6 7 8 9 10 11 12 13 14 15 16 17 18 19 20 21 22 23 24 25 26 27 28 29 30 31 ... inline double clamp (double x, double min, double max) if (x < min) return min; if (x > max) return max; return x; } inline void write_color (unsigned char *& p, color pixel_color, int samples_per_pixel) auto r = pixel_color.x (); auto g = pixel_color.y (); auto b = pixel_color.z (); auto scale = 1.0 / samples_per_pixel; r *= scale; g *= scale; b *= scale; *p++ = (unsigned char )(256 * clamp (r, 0.0 , 0.999 )); *p++ = (unsigned char )(256 * clamp (g, 0.0 , 0.999 )); *p++ = (unsigned char )(256 * clamp (b, 0.0 , 0.999 )); } ...
4 测试反走样效果 接下来修改主函数,测试一下反走样实现效果:
1 2 3 4 5 6 7 8 9 10 11 12 13 14 15 16 17 18 19 20 21 22 23 24 25 26 27 28 29 30 31 32 33 34 35 36 37 38 39 40 41 42 43 44 45 46 47 48 49 50 51 52 53 54 55 56 57 58 #include <iostream> #include <string> #define STB_IMAGE_WRITE_IMPLEMENTATION #include "stb_image_write.h" #include "hittable_list.h" #include "sphere.h" #include "color.h" #include "camera.h" int main () std::string SavePath = "D:\\TechStack\\ComputerGraphics\\Ray Tracing in One Weekend Series\\Results\\" ; std::string filename = "Antialiasing.png" ; std::string filepath = SavePath + filename; const auto aspect_ratio = 16.0 / 9.0 ; const int image_width = 400 ; const int image_height = static_cast <int >(image_width / aspect_ratio); const int channel = 3 ; const int samples_per_pixel = 100 ; camera cam; hittable_list world; world.add (make_shared <sphere>(point3 (0 , 0 , -1 ), 0.5 )); world.add (make_shared <sphere>(point3 (0 , -100.5 , -1 ), 100 )); unsigned char * odata = (unsigned char *)malloc (image_width * image_height * channel); unsigned char * p = odata; for (int j = image_height - 1 ; j >= 0 ; --j) { std::cerr << "\rScanlines remaining: " << j << ' ' << std::flush; for (int i = 0 ; i < image_width; ++i) { color pixel_color (0 , 0 , 0 ) ; for (int s = 0 ; s < samples_per_pixel; ++s) { auto u = (i + random_double ()) / (image_width - 1 ); auto v = (j + random_double ()) / (image_height - 1 ); ray r = cam.get_ray (u, v); pixel_color += ray_color (r, world); } write_color (p, pixel_color, samples_per_pixel); } } stbi_write_png (filepath.c_str (), image_width, image_height, channel, odata, 0 ); std::cerr << "\nDone.\n" ; }
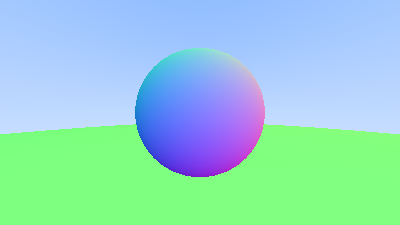
效果如下:
没有反走样的效果如下: